
I’ve made another doll room, this time its Batgirl’s Batcave
made for my DC Superhero Girls Batgirl doll. As always with my doll rooms, I
was part inspired by My Froggy Stuff on YouTube.

Sometimes a project will just no longer work quite as well
as it used to. This was the case with the Superhero Hang Out doll room as since
I made that my collection has expanded massively. However rather than just
throwing it away I decided to repurpose it into a Batcave for Batgirl. I cut
the Avenger’s half of the original room off. I then covered the rough edges with
a navy paper to neaten them. I also changed the floor with a dark wood grain
paper.

In cutting down the Superhero Hang Out the room had lost
some of its size. I took a cereal box and cut one side and one larger piece off
it so that I could attach it to the original box and expand that amount of
space in the Batcave.

The Batcave is always hidden in plain sight and this was
something I wanted to reference in my doll room. I covered the side of the box
that would be on the front of the outside with some of the box art from one of my
DC Superhero Girl’s dolls. I then added a strip of paper across it and some red
paper around it to create a backdrop that should resemble a room with a large window.

Batgirl has always been a techie and so I knew that I needed
to make sure she had several computer monitors in her Batcave. I made a
printable of various computer screen using images of some of my favourite
superheroes – yes, there’s Grant Gustin as the Flash! I glued these screens onto
card and cut them out so that they had some depth. I stuck the six screens that
I chose to use onto a piece of black card.

With the screens mounted I then decorated the wall that
would be on the inside of the Batcave. I used a brown paper for the top
section, I covered the bottom section with the same navy paper that I’d edged
the other half of the Batcave with to visually link to the two parts together. I
then stuck the mounted screens onto the wall. With the inside wall completed
finally I could attach the two sides of the Batcave together.
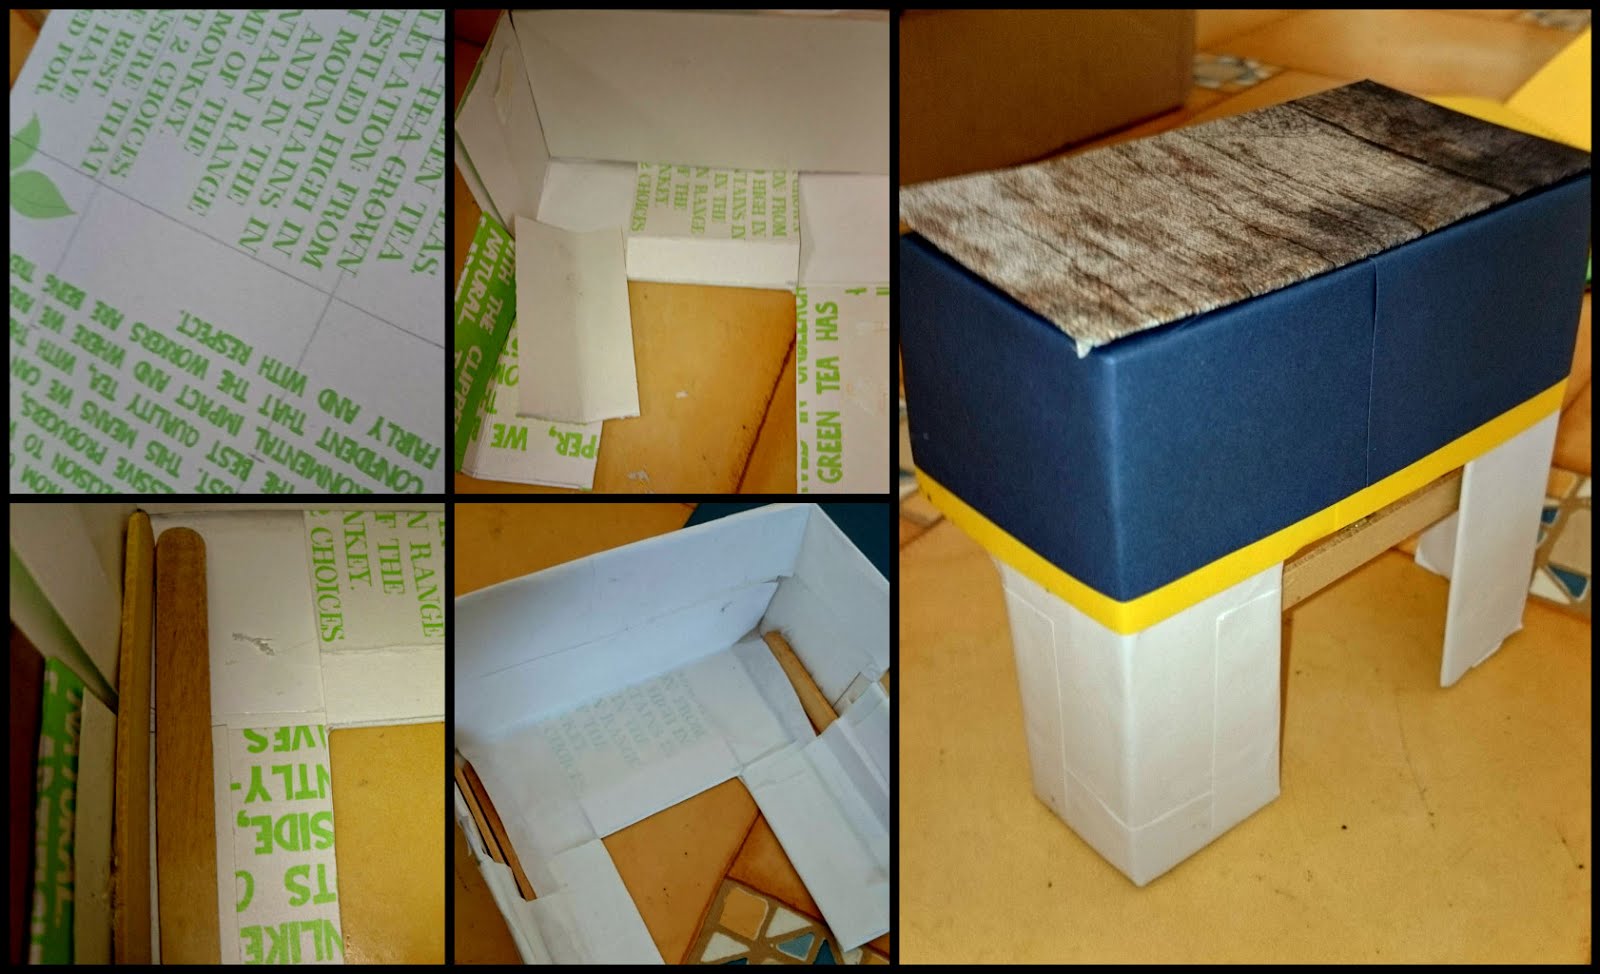
The desk was important to make properly as it is main piece
of furniture within this room. I started with a tea box that I marked up with
measurements based on the Batgirl doll. I then cut the box based on my markings
and reinforced the sides with left over of card. I also hot glued some ice lolly
sticks to further strengthen the sides of the desk. Next I covered up all the
joins with paper – this helps to neaten the overall appearance but also gives
the desk a bit more strength. I kept the legs of the desk white and then used the
navy paper that I’d used elsewhere with a yellow trim to cover the top part. I
finished off the desk with a piece of card covered in wood grain paper to
create a dark wood top to the table.

Before I could finish making and begin begin decorating the Batcave there was one
last detail I wanted to add. I hot glued the ring from a bottle into one corner
of the box and then pulled a length of black tulle through it. This creates a
curtain that adds a little more depth to the Batcave and also gives a touch of
black without making the whole appearance of the room too dark.

Now I could move things into the room. The desk fits in
well, I used a chair that’s actually a phone holder I found on Amazon to go
with the desk and I made a cushion for the chair. I placed some techie items
which are actually printables from My Froggy Stuff on the desk along with a few
doll accessories.

And that is how I made a Batcave for the DC Superhero Girls
Batgirl doll. This was a surprisingly labour intensive project but I am really
pleased with how it turned out.
No comments:
Post a Comment